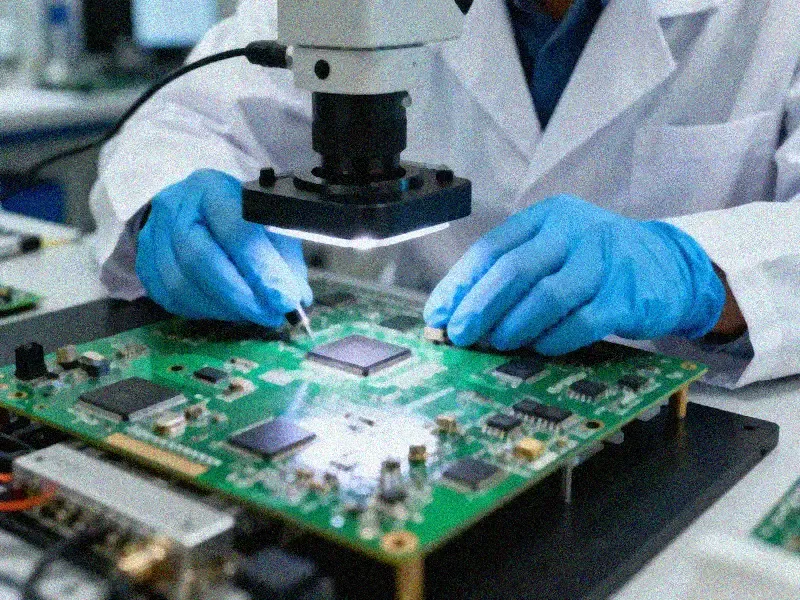
What Is HDI PCB Design?
HDI PCBs are characterized by one or more of the following:
- Micro-vias: Laser-drilled vias ≤ 0.15mm diameter (vs. 0.2mm+ for mechanical drill)
- Blind vias: Connect outer layers to adjacent inner layers without going through the entire board
- Buried vias: Connect inner layers to each other, invisible from the outer surface
- High pad density: ≥ 20 pads per cm² (IPC-2226 definition)
- Fine-pitch lines: Line/space below 3.0/3.0 mil on outer layers
The result: dramatically more signal connections in the same board footprint, or the same connections in a dramatically smaller board.
HDI vs. Standard PCB: The Key Differences
| Parameter | Standard PCB | HDI PCB |
|---|
| Via type | Through-hole only | Blind, buried, stacked, micro-vias |
| Min via diameter | 0.2mm (mechanical) | 0.075mm (laser) |
| Min line/space | 3.5/3.5 mil | 2.0/2.0 mil or finer |
| BGA escape routing | Difficult below 0.5mm pitch | Enables 0.3mm+ pitch |
| Layer count (same density) | More layers needed | Fewer layers, same density |
| Board size (same function) | Larger | 30–50% smaller |
| Cost (prototype) | Lower | Higher |
| Cost (high-volume) | — | Competitive for compact designs |
When Do You Actually Need HDI?
HDI isn't always the answer. Here's a practical decision framework:
Use HDI when:
- Your BGA component has a pitch below 0.5mm and you can't escape with through-hole vias
- Board real estate is constrained (wearables, mobile devices, implantable medical, compact edge AI modules)
- You're using high-speed signals above 10Gbps where long via stubs cause reflections
- Your layer count on a standard board exceeds 12–16 layers primarily due to routing congestion (not electrical need)
- You need to pass a test for SI or EMI where via stubs are a known contributor
Stick with standard PCB when:
- All your ICs are in 0.5mm pitch or larger packages
- You're not routing above 5Gbps
- Board size is not a constraint
- Budget is very tight and prototype quantity is very small
HDI Stack-Up Structures: 1+N+1, 2+N+2, and Beyond
The IPC-2226 standard defines HDI structures by the number of sequential lamination layers:
1+N+1 (Type I HDI)
One layer of micro-vias on each outer layer, connected through a standard multilayer core.
[Layer 1] ─ micro-via
[Layer 2] ─────────────
[Core: Layer 3 – N-2]
[Layer N-1] ────────────
[Layer N] ─ micro-via
Best for: Most mainstream HDI applications — smartphones, tablets, industrial IoT, compact AI modules. Achieves significant density improvement without the cost of multiple lamination cycles.
Typical layer count: 6–12 layers
2+N+2 (Type II HDI)
Two layers of stacked or staggered micro-vias on each side.
[Layer 1] ─ micro-via
[Layer 2] ─ micro-via (stacked or staggered)
[Core layers]
[Layer N-1] ─ micro-via (stacked or staggered)
[Layer N] ─ micro-via
Best for: High pin-count BGAs (1000+ balls), dense memory subsystems, compact AI edge modules.
Note: Stacked micro-vias (directly on top of each other) require filled and plated via holes — higher cost but better structural integrity. Staggered micro-vias are lower cost but require more real estate.
Any-Layer HDI
Every layer can connect to any other layer via micro-vias. Used in smartphones and ultra-compact wearables.
Best for: Extreme miniaturization. Cost and complexity are substantially higher — typically justified only for very high-volume consumer products.
Via-in-Pad (VIP)
Micro-vias placed directly within component pads (especially BGA pads), then filled and plated flat.
When to use: 0.4mm and 0.35mm pitch BGAs where even staggered micro-vias can't be routed in the escape area.
Manufacturing requirement: The via must be copper-filled and planarized before pad plating. This is a critical process step — an improperly filled VIP will cause BGA solder joint issues.
HDI PCB Design Rules: Key Parameters
Micro-Via Geometry
| Parameter | Recommended | Manufacturing Minimum |
|---|
| Laser via diameter | 0.1mm | 0.075mm |
| Pad diameter | Via + 0.15mm | Via + 0.10mm |
| Via depth | ≤ 1× via diameter | — |
| Aspect ratio (depth:diameter) | ≤ 0.8:1 | ≤ 1:1 |
| Capture pad to trace clearance | 0.1mm | 0.075mm |
Line Width and Spacing
| Layer | Recommended | Achievable |
|---|
| Outer layers | 3.0/3.0 mil | 2.0/2.0 mil |
| Inner layers | 3.5/3.5 mil | 2.5/2.5 mil |
| High-speed differential | 3.5/3.5 mil minimum | — |
BGA Escape Routing Guidelines
0.5mm pitch BGA: Through-hole vias possible; HDI optional
- Dog-bone escape with 0.25mm pad, 0.15mm drill
0.4mm pitch BGA: HDI strongly recommended
- Via-in-pad or dog-bone with laser micro-via (0.1mm diameter)
- 2-row escape requires micro-vias
0.35mm pitch BGA: HDI required
- VIP with copper fill mandatory
- 1+N+1 minimum; 2+N+2 for large BGAs
Stacked vs. Staggered Micro-Vias
| Stacked | Staggered |
|---|
| Real estate | Less | More (offset needed) |
| Reliability | Higher (with fill) | Good |
| Cost | Higher | Lower |
| Fill requirement | Copper fill + plating | Not required |
| Recommendation | High-reliability / small pitch | Cost-optimized builds |
HDI Design for Signal Integrity
One of the most underappreciated benefits of HDI is via stub elimination.
On a standard through-hole via in a multilayer board, the via barrel extends beyond the last connected layer. This "stub" acts as a transmission line stub, creating reflections at high frequencies. For signals above ~5Gbps, this becomes a significant SI problem — visible as eye closure in S21 measurements.
Solutions using HDI:
- Blind vias: Terminate exactly at the last connected layer — no stub
- Back-drilling: Remove the stub by drilling from the opposite side (applicable to non-HDI boards too, but HDI eliminates the need entirely on critical nets)
- Via-in-pad with controlled depth: Keeps the signal path vertical through only the intended layers
Practical SI benefit: In a 112Gbps PAM4 design, replacing through-hole vias with HDI blind vias on high-speed SerDes lanes can reduce via stub reflections from -3dB to near-zero at 28GHz — the difference between a board that works and one that doesn't.
HDI PCB Design for Thermal Management
Dense HDI boards often have equally dense thermal challenges. High-power components (processors, power management ICs, RF amplifiers) in fine-pitch packages generate heat that has to go somewhere.
Thermal via strategies in HDI:
- Filled thermal vias under exposed pads: Copper-filled micro-vias in the exposed pad area provide a conduction path to inner ground planes
- Copper coin embedding: For extremely high-power devices, a solid copper coin can be embedded in the PCB beneath the component
- Back-side heat spreading: Thermal vias connect to a back-side ground pour that interfaces with a heatsink or chassis
Rule of thumb: A matrix of 0.3mm filled thermal vias at 0.6mm pitch under a QFN or processor package can reduce thermal resistance from package to board by 40–60% vs. no thermal vias.
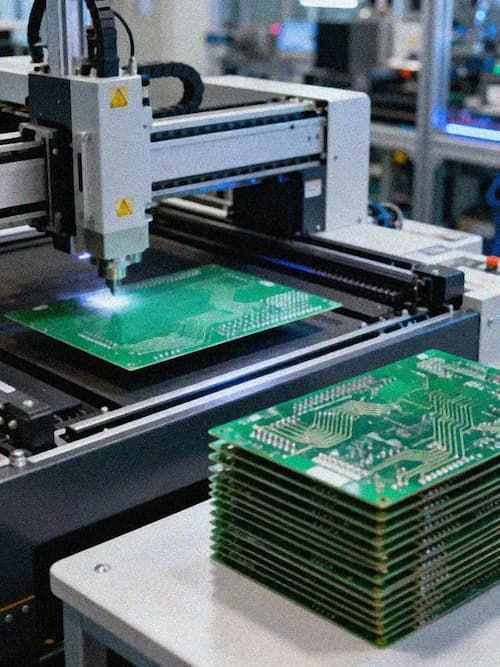
HDI Manufacturing Process: What Happens at the Factory
Understanding the manufacturing process helps you design HDI boards that are manufacturable — and helps you evaluate supplier capability.
Sequential Lamination
Unlike standard multilayer boards that laminate all layers at once, HDI requires multiple lamination cycles:
- Fabricate the core multilayer (inner layers)
- Laminate first HDI layer pair
- Laser drill micro-vias in new layers
- Plate and fill vias as required
- Laminate next HDI layer pair (for 2+N+2)
- Repeat until full stack-up is complete
- Final outer layer processing
Each lamination cycle adds cost and lead time — which is why the simplest stack-up that meets your density requirements is usually the right choice.
Laser Drilling
CO₂ lasers (for organic resin removal) and UV laser systems drill micro-vias with high precision:
- Laser ablation removes resin and exposes the copper target pad
- Plasma desmear cleans the via barrel for reliable plating
- Via inspection (cross-section) validates depth and geometry
Via Filling
For stacked micro-vias and via-in-pad:
- Electroplated copper filling (preferred for reliability)
- Conductive epoxy filling (lower cost, lower thermal/electrical performance)
- Non-conductive epoxy (for via-in-pad where electrical connection isn't needed, capped with copper plating)
Improperly filled vias are a common failure mode in HDI boards. Voids inside filled vias cause solder joint failures over thermal cycles. This is why cross-section inspection is mandatory for production HDI boards.
Kingbrother HDI Capabilities
| Parameter | Specification |
|---|
| Min. laser via diameter | 0.075mm |
| Max. aspect ratio | 1:1 |
| HDI structure | Up to Any-layer |
| Stacked micro-via | Up to 3 levels |
| Via fill | Copper electroplated, conductive epoxy, non-conductive epoxy |
| Min. line/space | 2.0/2.0 mil |
| Layer count | 4–30 layers (HDI) |
| Materials | FR-4, Rogers, Low-loss laminates |
| Impedance control | ±5% |
| Certifications | ISO 9001, ISO 13485, IATF 16949 |
Common HDI Design Mistakes to Avoid
1. Via-in-pad without specifying fill type Not all via fill processes are equal. Specify "copper electroplated fill + planarization" for BGAs under 0.4mm pitch. Epoxy fill may work for non-critical pads but will cause reliability problems under QFN and fine-pitch BGA components.
2. Stacked micro-vias without thermal cycling data Stacked vias without proper fill are a known reliability risk. IPC-6012 Class 3 requires thermal shock testing (-55°C to +125°C, 1000 cycles). If your application is automotive or industrial, factor this into your qualification plan.
3. Ignoring capture pad annular ring for micro-vias HDI vias have smaller capture pads. A minimum 0.05mm annular ring sounds easy, but registration tolerances of ±0.025mm mean you need to design for worst-case overlay. Use ≥ 0.1mm annular ring in your design rules.
4. Applying HDI to only one region of the board It's tempting to use HDI only around the dense BGA and through-hole vias everywhere else. This creates mixed-process complexity. Define your HDI zone clearly and communicate it to your manufacturer — they need to plan lamination sequences accordingly.
5. Forgetting back-drill requirements when HDI isn't applied to all high-speed vias If you're using HDI for BGA escape but through-hole vias elsewhere on high-speed nets, those through-hole vias still have stubs. Don't forget back-drilling specifications for high-speed through-hole vias.
Start Your HDI PCB Project
Whether you're routing your first fine-pitch BGA or designing a 20-layer HDI server backplane, Kingbrother's engineering team and manufacturing capability have you covered.